Create QR labels from Excel or CSV with DYMO ID (DYMO label printers)
In this tutorial, we cover how to import equipment lists from Excel spreadsheets or CSV files, and batch create individual labels with QR codes that will lead to web addresses from the imported file.
Note! We are not a supplier or the maker of the DYMO ID software and do not offer any support for it other than this article. Please contact DYMO or the supplier of your DYMO device if you need any help.
This tutorial applies to DYMO label printers only. DYMO ID is software that you can download and use for free if you have a DYMO label printer. If you don't already have the software, go to www.dymo.com and download it (under Support > Downloads).
With the DYMO ID software, you can create one and one label. But the real strength is that you can import lists of items, for instance from Excel or CSV files, and create multiple unique labels with very little effort.
In this tutorial, we take a CSV file exported from the equipment management software Itefy (go to the signup page if you want to test it for free), import it into DYMO ID, and create labels with the equipment name and a QR code leading to its public page - all in one operation.
#1 Create a label template
Open DYMO ID, select your label writer device, and the size of the labels you want to print on.
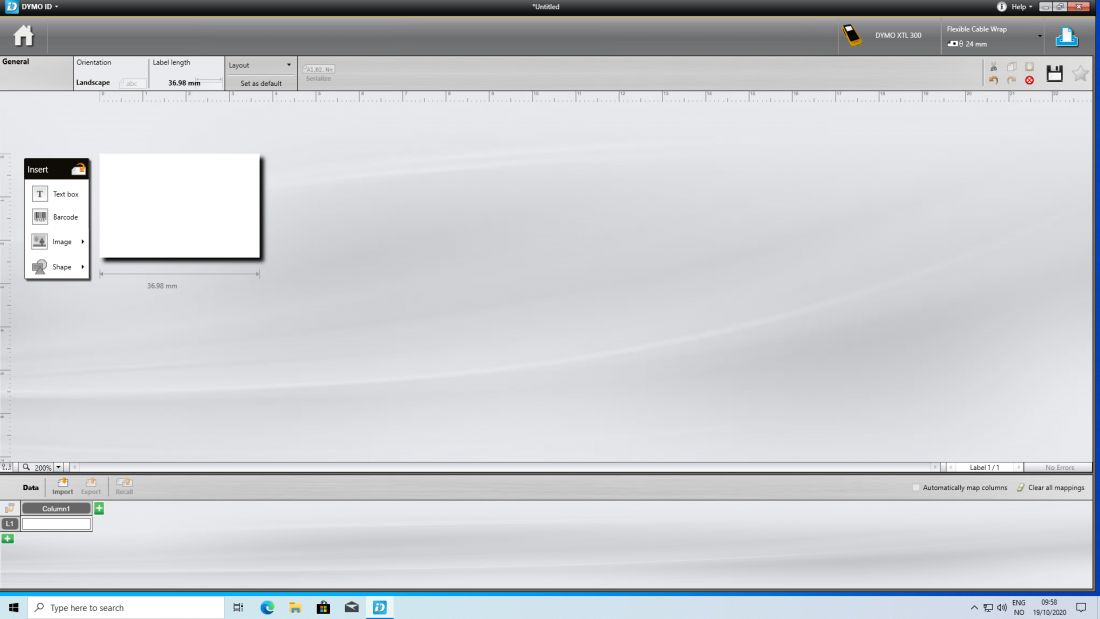
From the Insert box, hover over the Text box, and drag & drop onto the label. Write a random text into the box, e.g. Item name. You can move the box around by clicking and holding the edges of the box, and to resize, click and hold the white squares along the box edges and lines. Notice that you can't drag the box all the way to the label edges - that's just a physical limitation of the label printer itself.
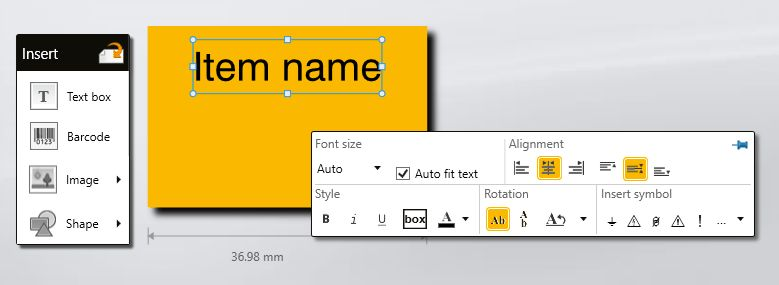
Now, insert the QR code box by drag & drop from Barcode onto the label.
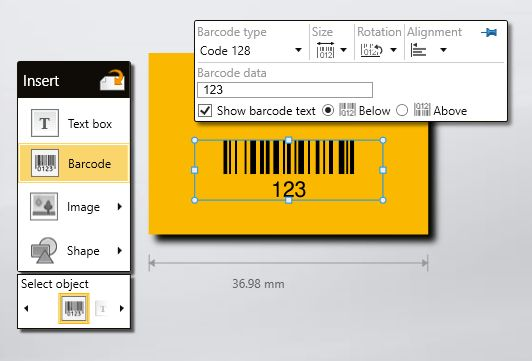
A normal barcode will probably not work very well with smartphones, so we are going to make some changes to it so that it will be a scannable QR code that can lead to a website for that item.
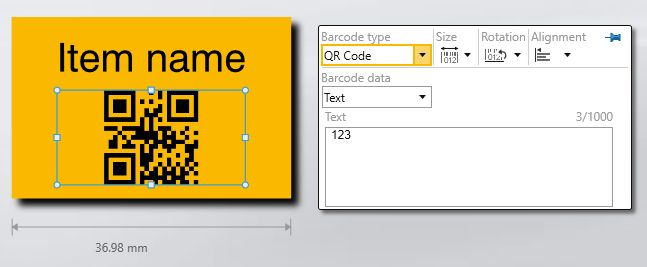
All you really need to do is to change the Barcode type to QR Code. Do not change the Barcode data, just let it stay on Text if there is a web address you want the QR code to lead to. Although you have an option for Web page, that option will break the functionality in modern web browsers on smartphones.
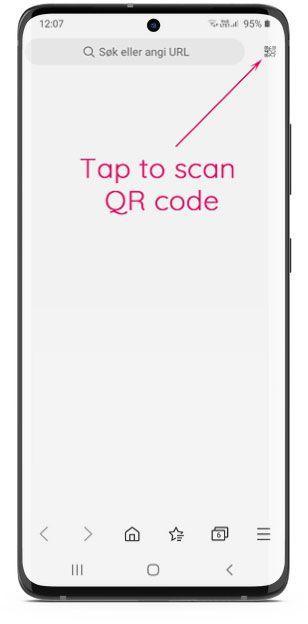
Tip! You can test the QR code before you print the labels. Just enter a web address, e.g. https://www.google.com/ into the text (replace the sample text 123) in the text box, open the web browser on your phone, tap the QR code icon (not present on older phones) and scan the QR code on the DYMO ID screen. If the website appears, then it's working.
#2 Import the data file
In the lower part of the DYMO ID window, click Import.
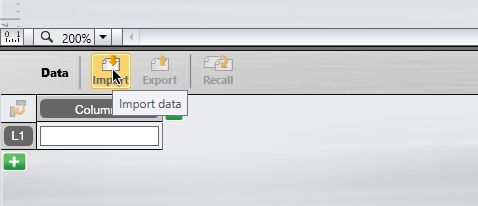
The Import Data window will appear. Select Browse under Select data file, and select the file with the data you want to create labels from. You can import from MS Access (.mdb), MS Excel (.xls), Text (.csv), or Universal Data Link (.udl). In this example, we use a CSV file we have exported from Itefy. Click Open.
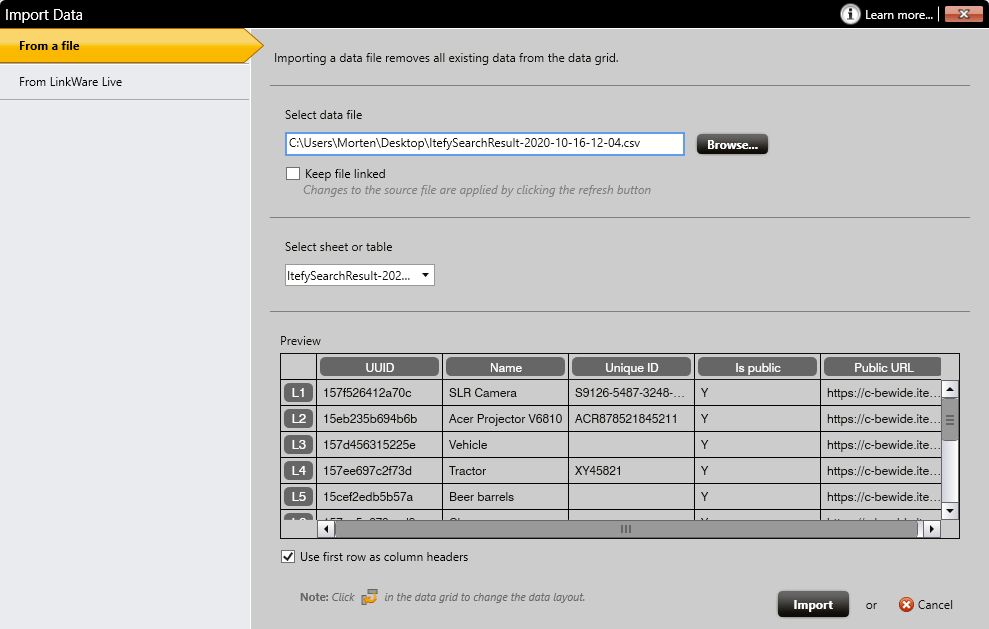
If your Excel or database file has multiple sheets or tables, select the sheet or table you want to import from in the Select sheet or table drop-down menu. If you import a CSV file, you can ignore this option.
If your file is valid, you will get a preview of the data. In the first row contains just the names of the columns, check Use first row as column headers checkbox.
If everything looks fine, click Import.
#3 Link data to labels
The last step before you are ready to print your labels is to copy the data to the labels.
Let's begin with the item name text box. First, click the box to select it, then remove all the text inside. Then, drag the data from the item name column over to the text box.
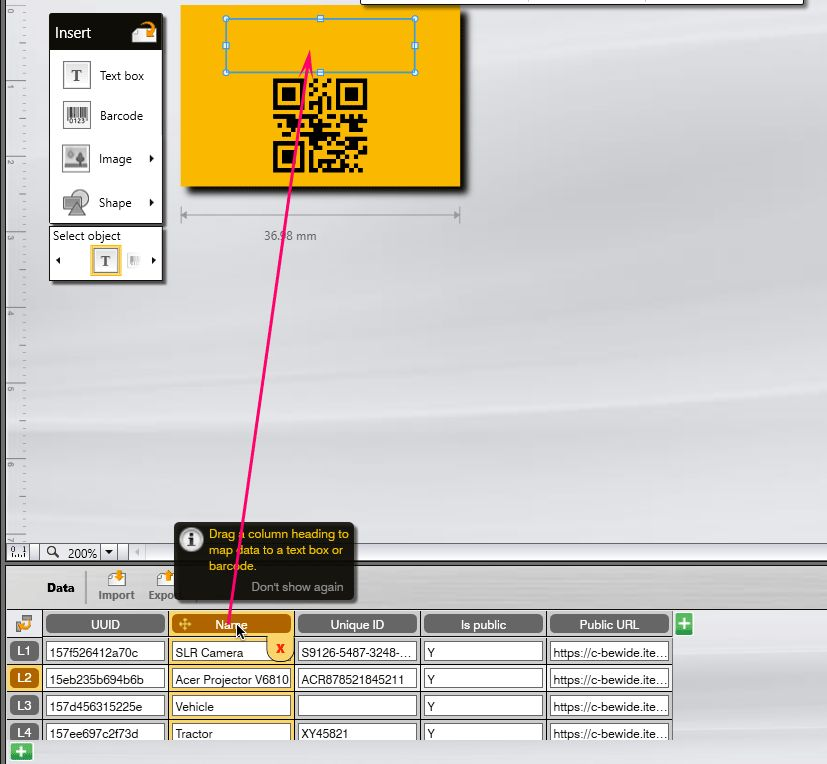
You can check if each label has a unique text by selecting different rows (click L1, L2, etc.) in the data table.
Do the exact same operation for the QR code: Drag the web address column (in this case, Public URL) from the data table, and drop it on the QR code.
#4 Test before printing
Labels cost money, so before you print you should check that the labels are correct and that the QR codes are working properly. Simply check a few of your labels by clicking different rows and see if the item name is correct. Also, try to scan a few QR codes with your phone to verify that it is working and that the correct web page is showing.
#5 Print
If everything looks fine (you can always do changes directly in the data table in DYMO ID), you're ready to print your labels.
