When you reserve an item, it should be checked out directly from the reservation to:
- Prevent the reservation from becoming Overdue.
- Automatically connect the reservation to the checkout.
Let’s do that now. First, we’ll create a quick reservation and then convert it to a checkout:
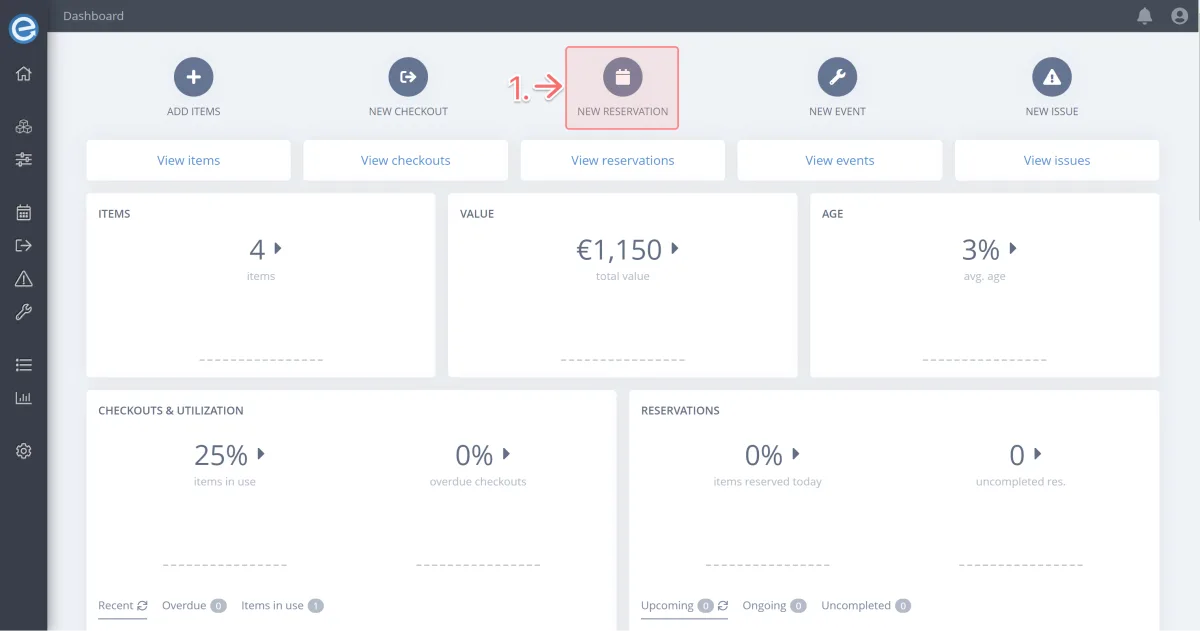
Click New reservation on the dashboard
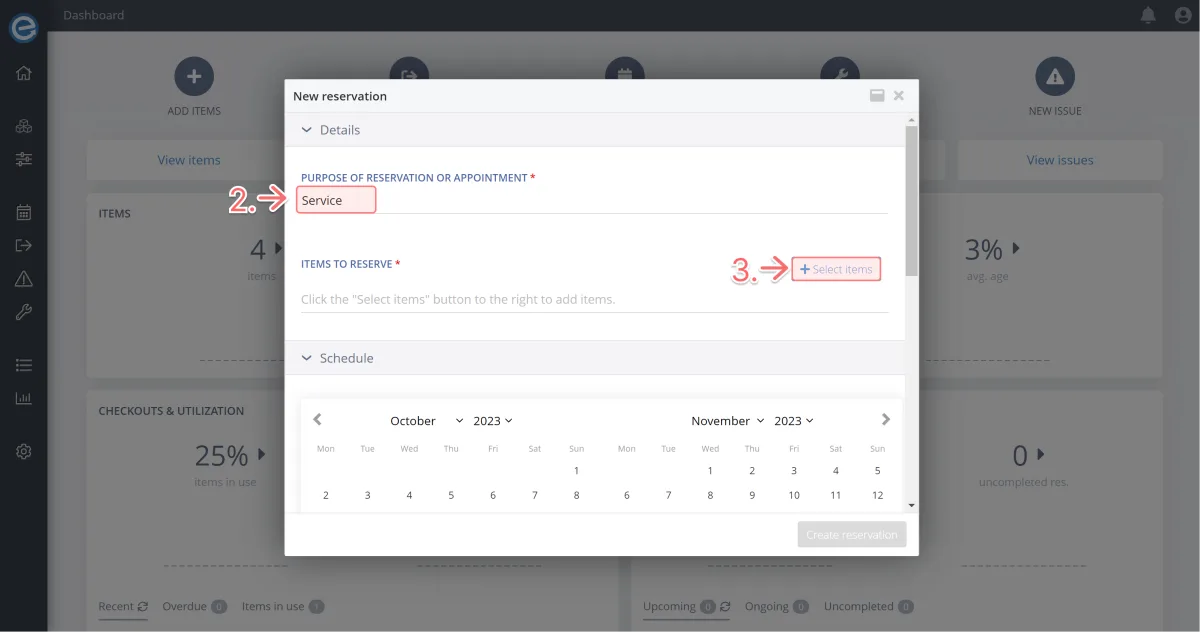
- For the reservation purpose type Service.
Click + Select items to add one or more items.
If you were following along in Course 1 [hyperlink], you’ll have the item Epson Home Cinema.
Tick it and click the Select (1) button.
If you don’t have that item, select any item in your database.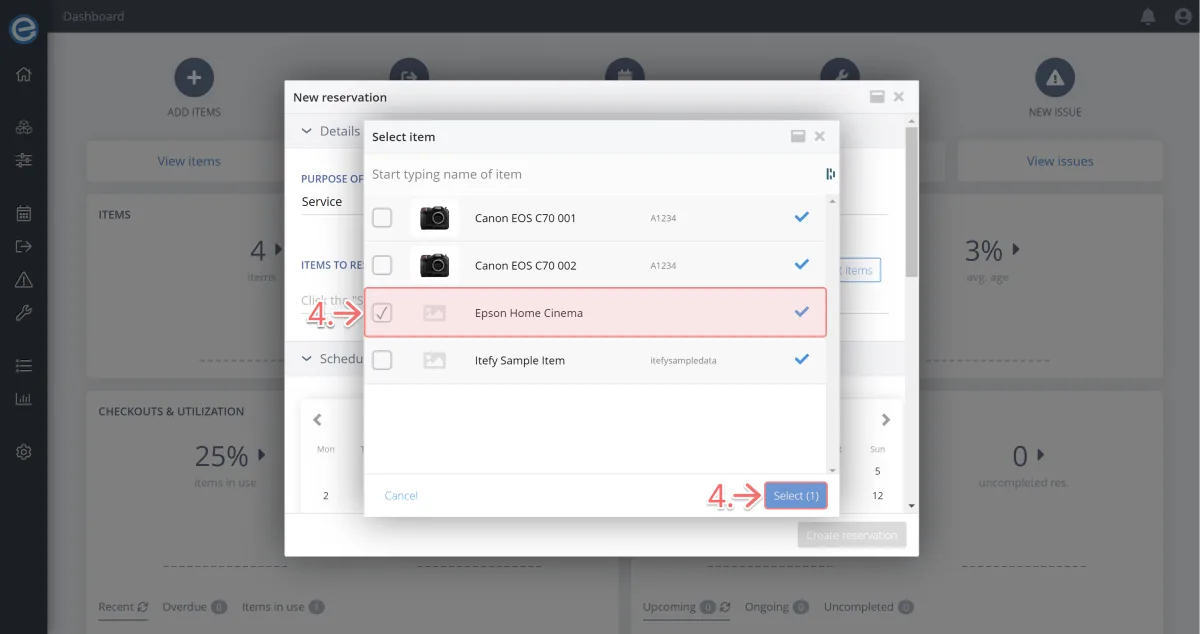
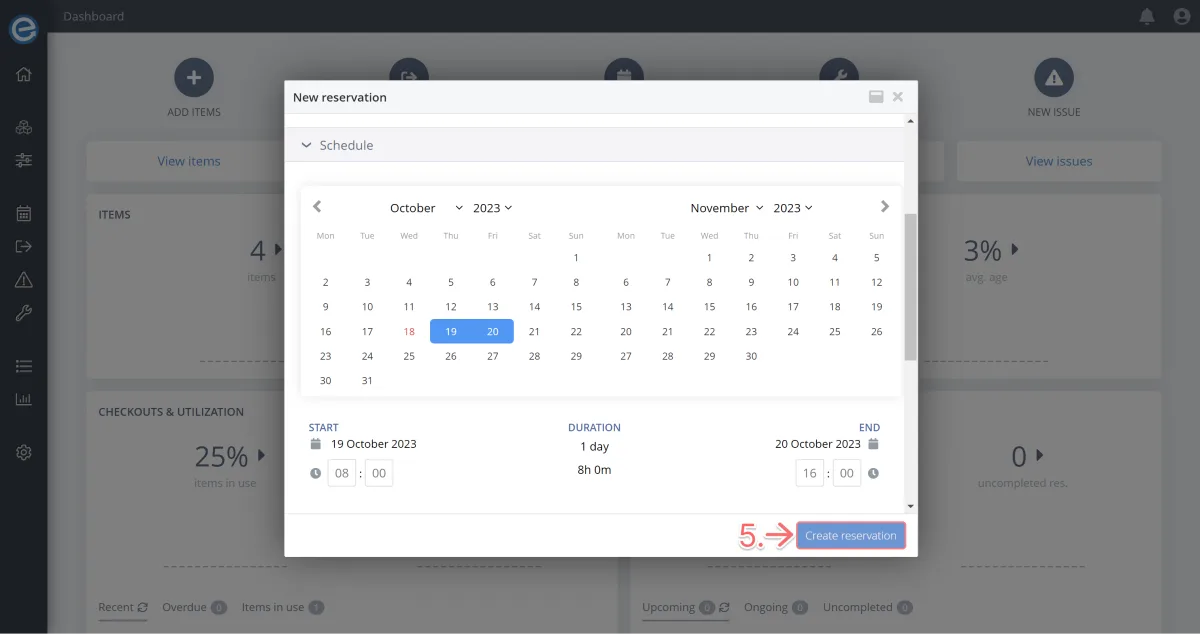
We’ll leave the default dates as is. Click Create reservation.
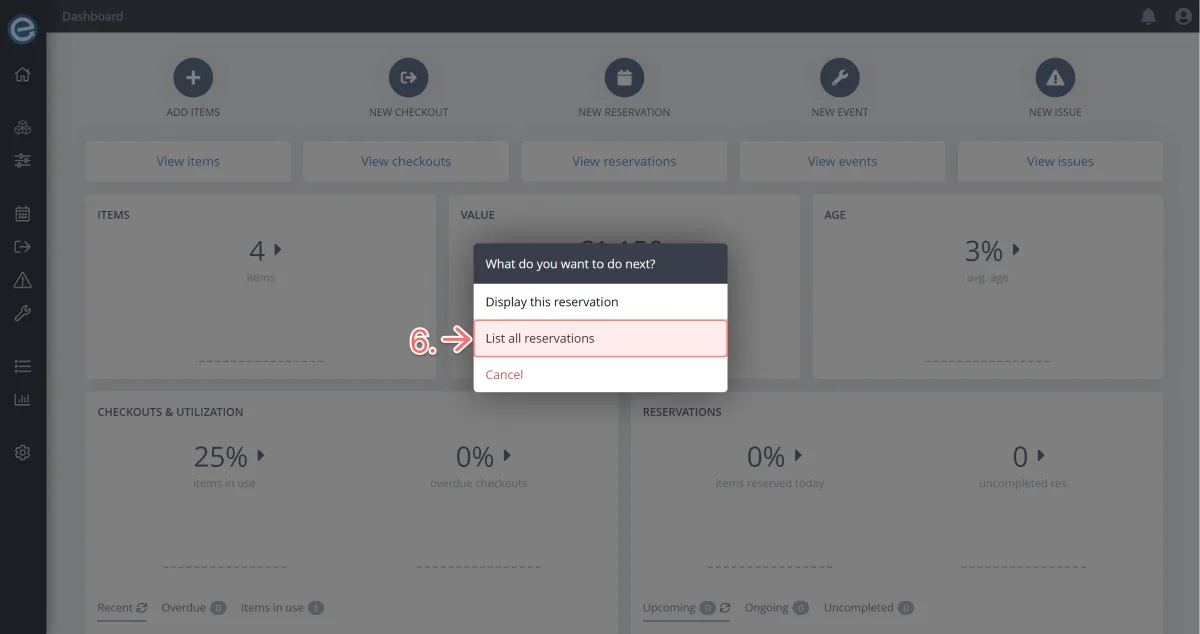
Now the reservation is in place, let’s click List all reservations. We’re going to check the item out from the reservation.
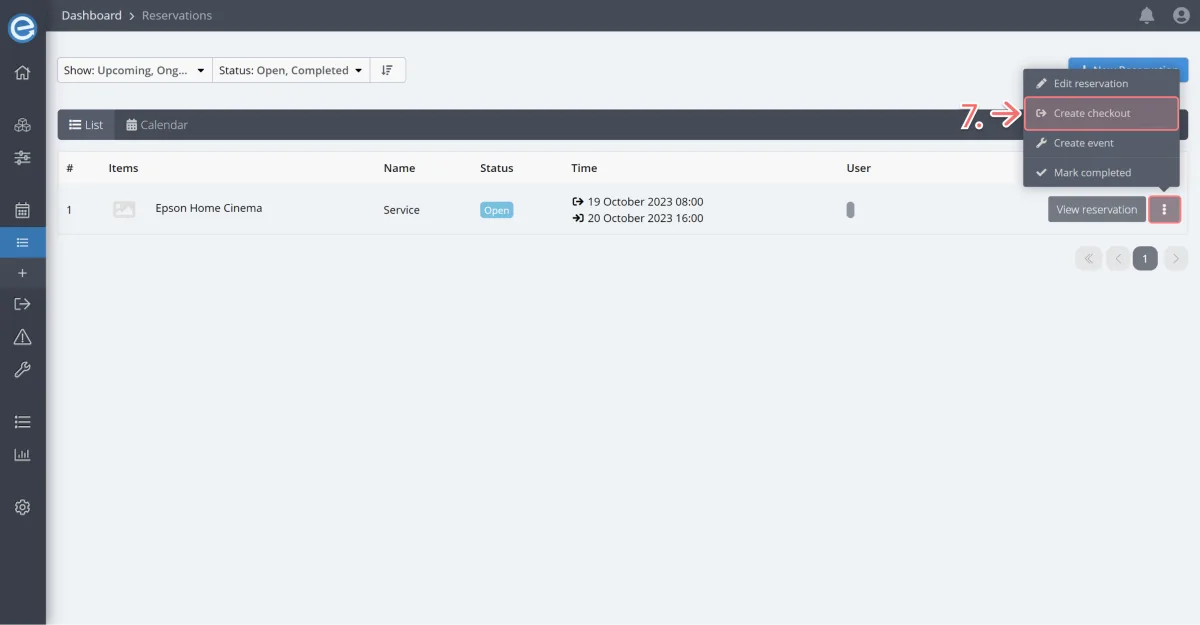
Next to the reserved item, click the Kebab icon and select Create checkout from the dropdown menu.
You can see the checkout has pulled through the relevant information from the reservation.
At this point you can change the return date, add other items, and add additional details like location etc.
Click Check out then check View all checkouts.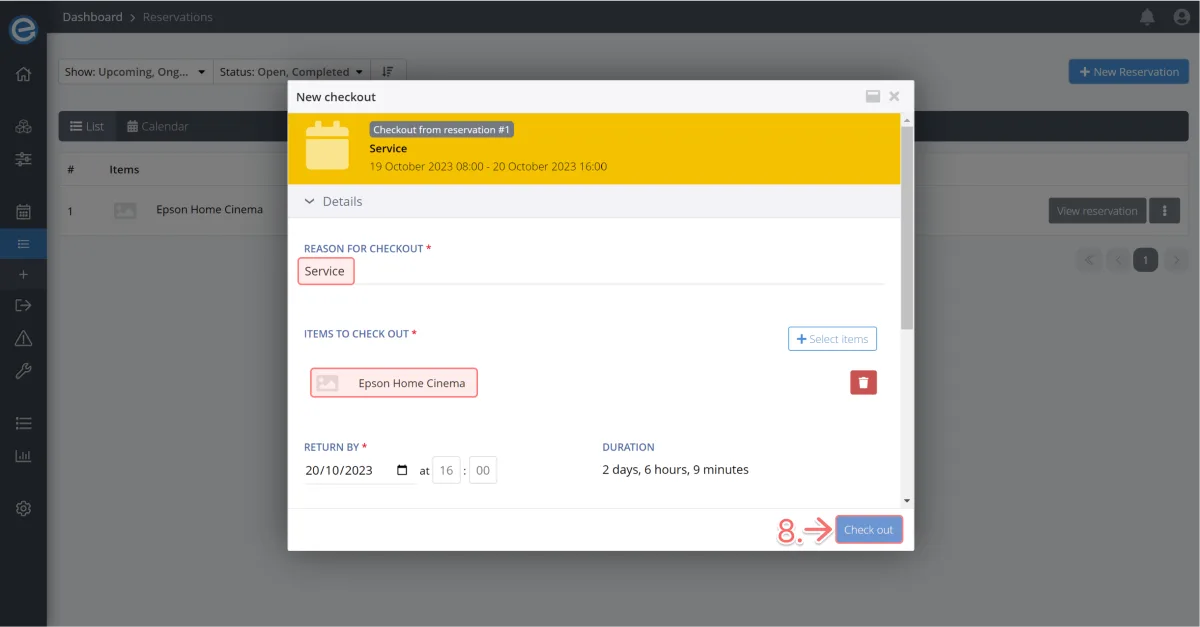
Now. let’s view the reservation and how it links to the checkout:
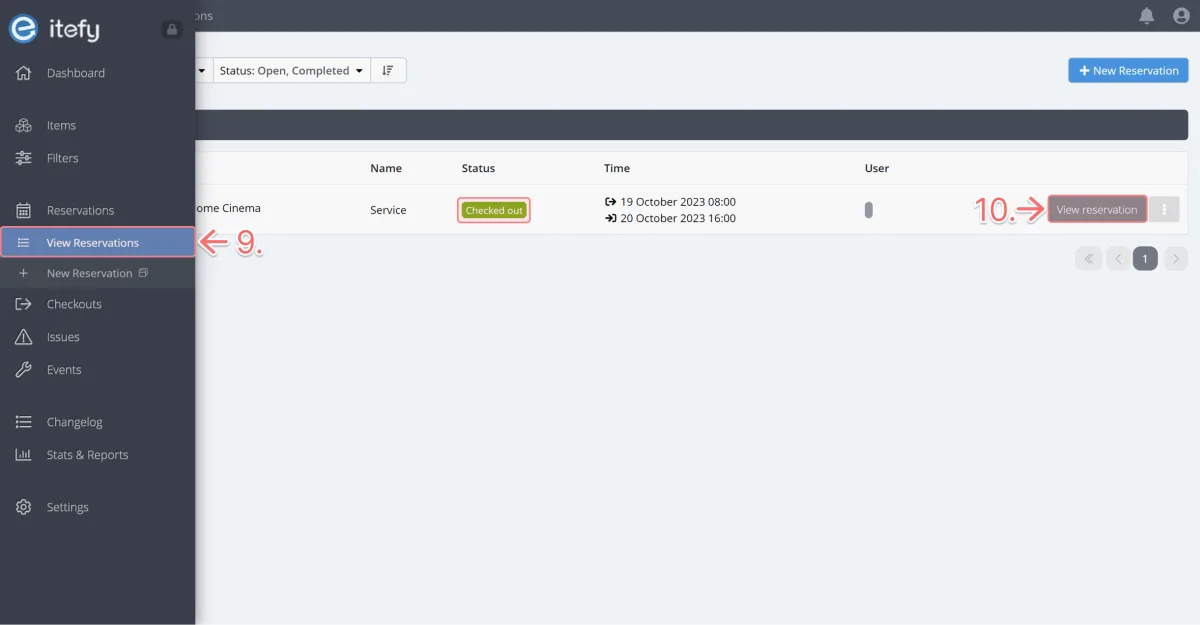
- Click View reservations from the Reservations menu on the sidebar.
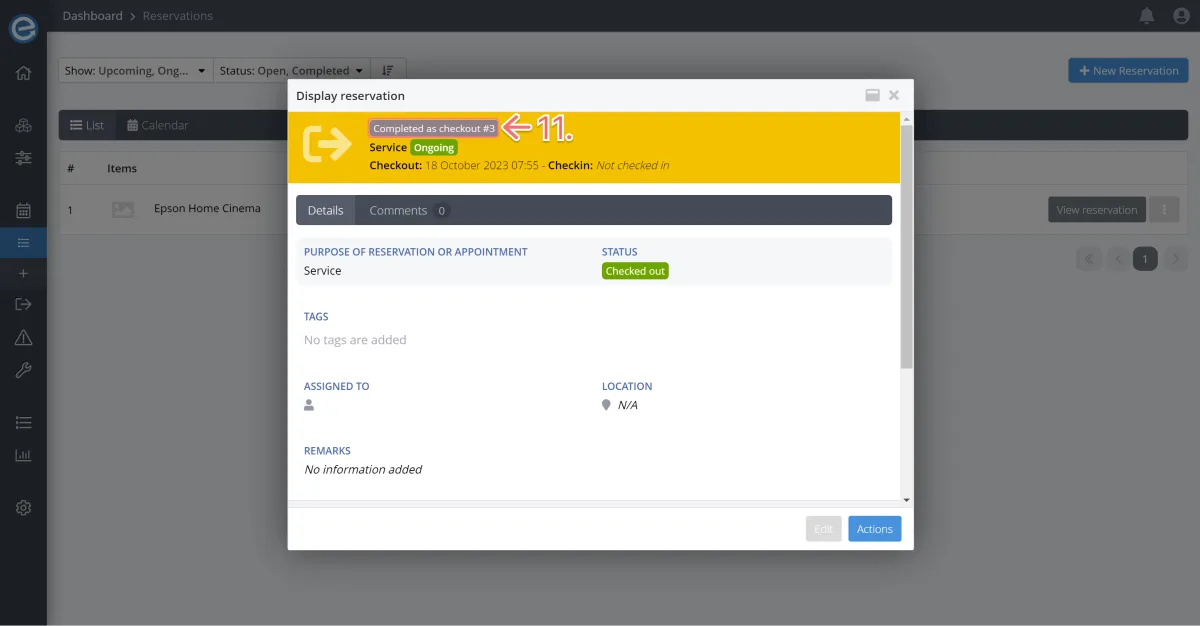
You can see the item in the reservations list with a Checked out status. Click View reservation
Here you can see the reservation has been completed as a checkout. Click the link Completed as checkout to view the checkout.
Up next
In Course 5 we’ll go into more detail about how to create one-off and recurring reservations for future use or maintenance of your items.