Imagine that a camera had the battery changed and you want to record that in the item’s timeline.
There are two ways in the web app to record an event for an item:
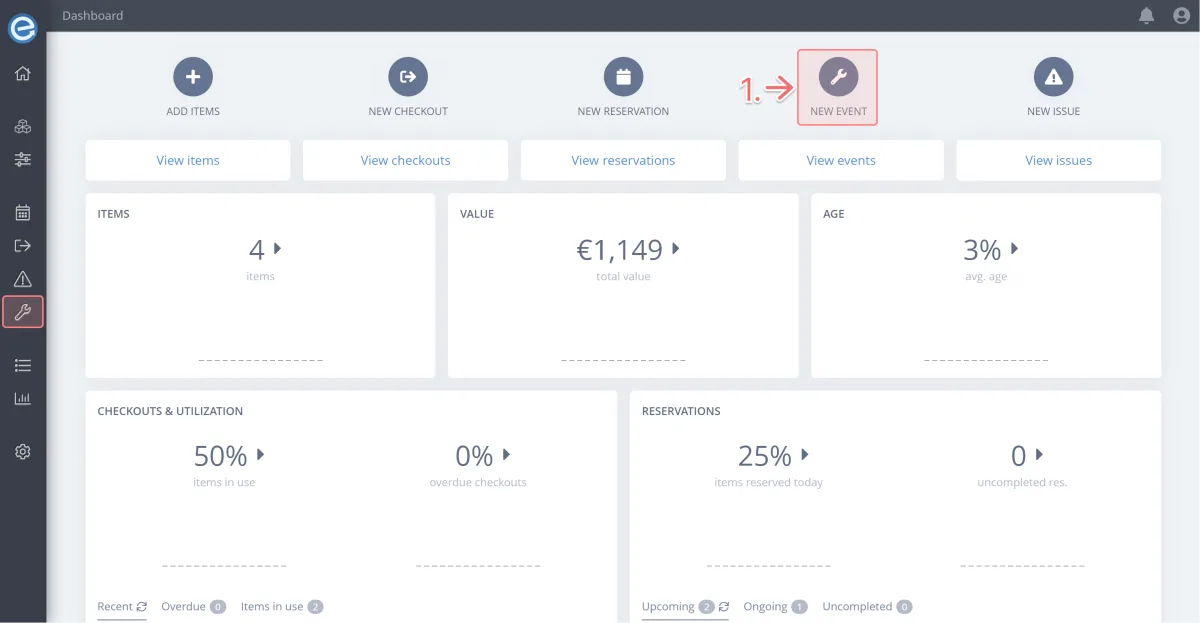
Click ‘New event’ on the dashboard or under the Events dropdown on the sidebar.
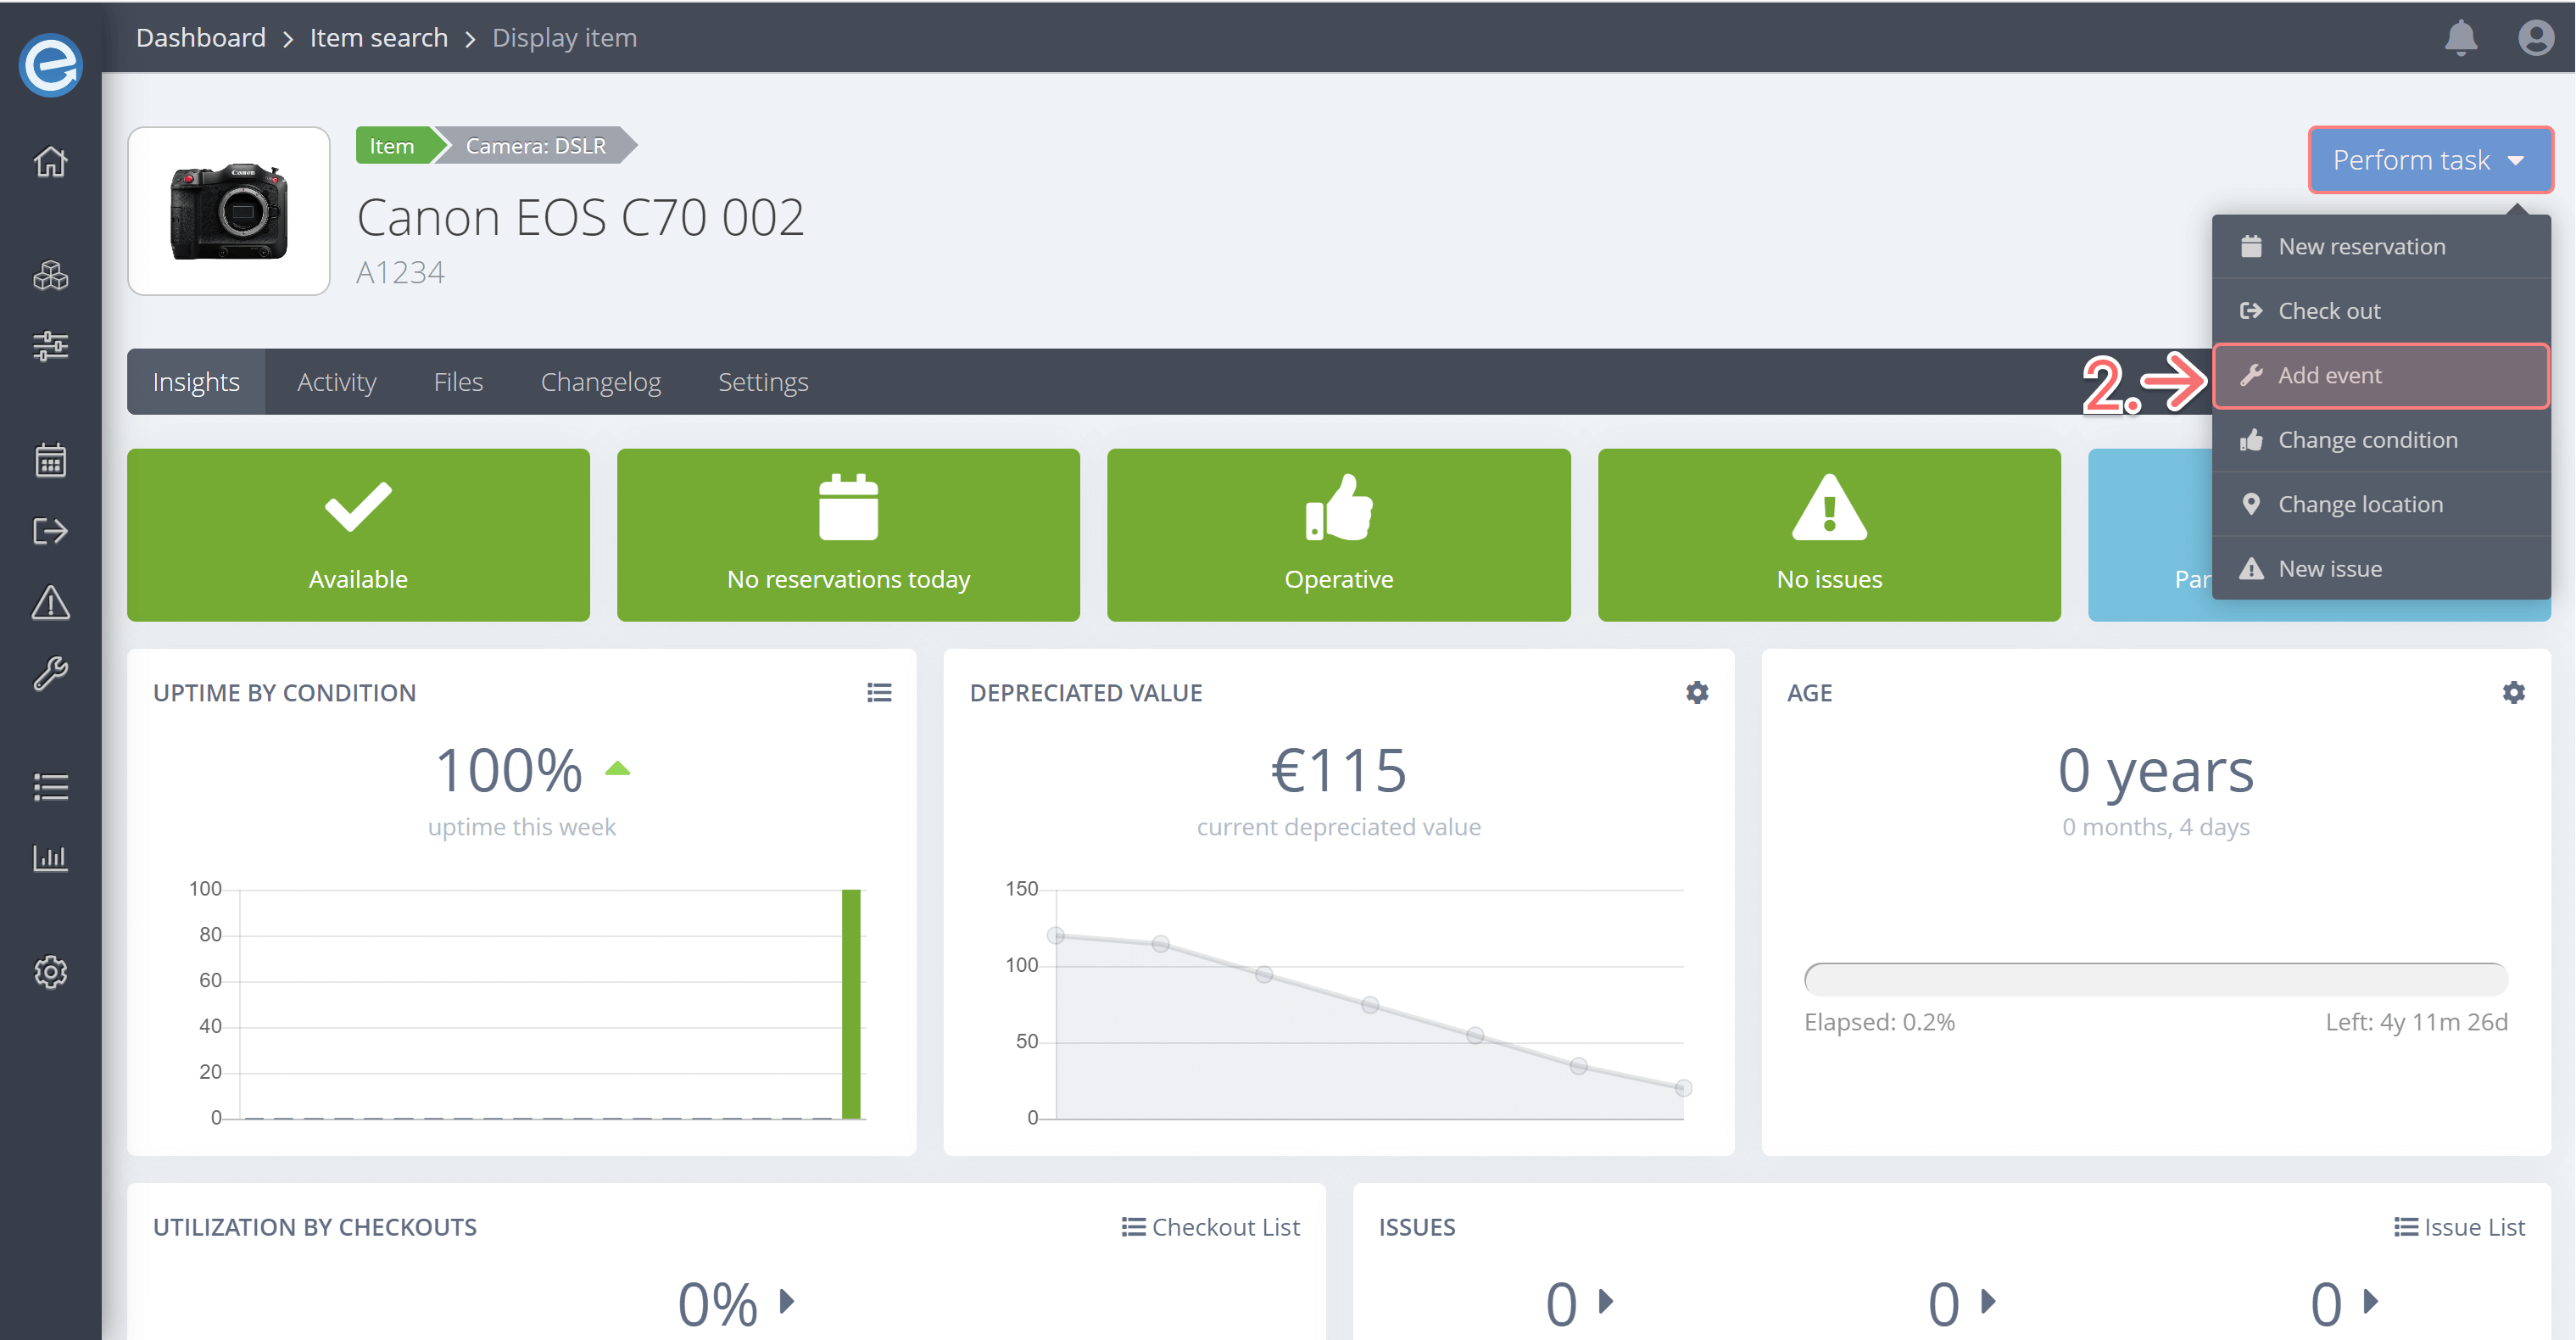
Alternatively, go to the Item page and select New event from the Perform task dropdown menu.
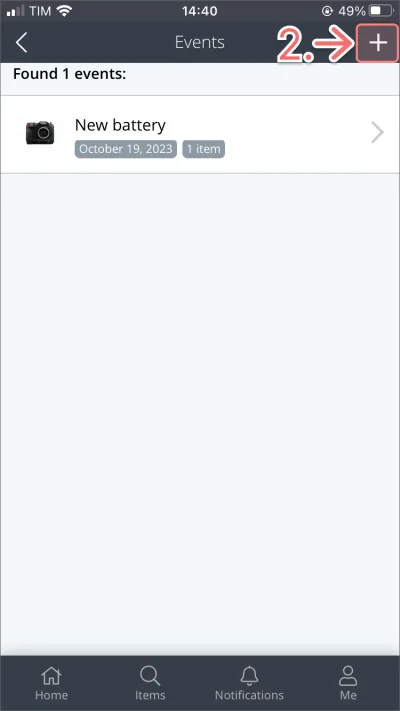
You can also add an event to an item using Itefy GO on your mobile phone:
On the Home screen, scroll to Events.
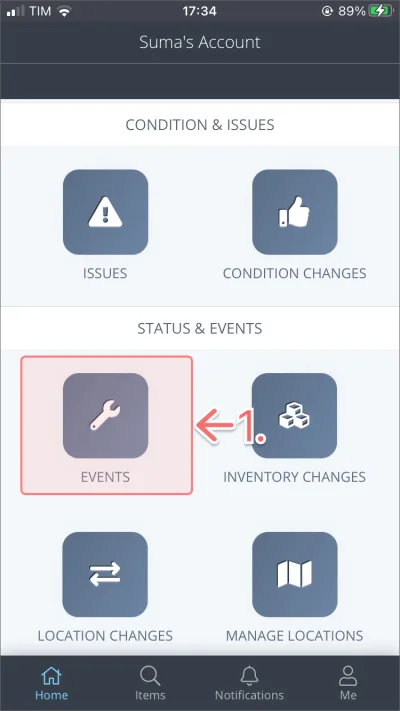
Click the + icon to add a new event.
Note: A user must have permission to create Events.
Refer to User Management & Permissions for how to grant a user permission to create and manage events.
Add event details
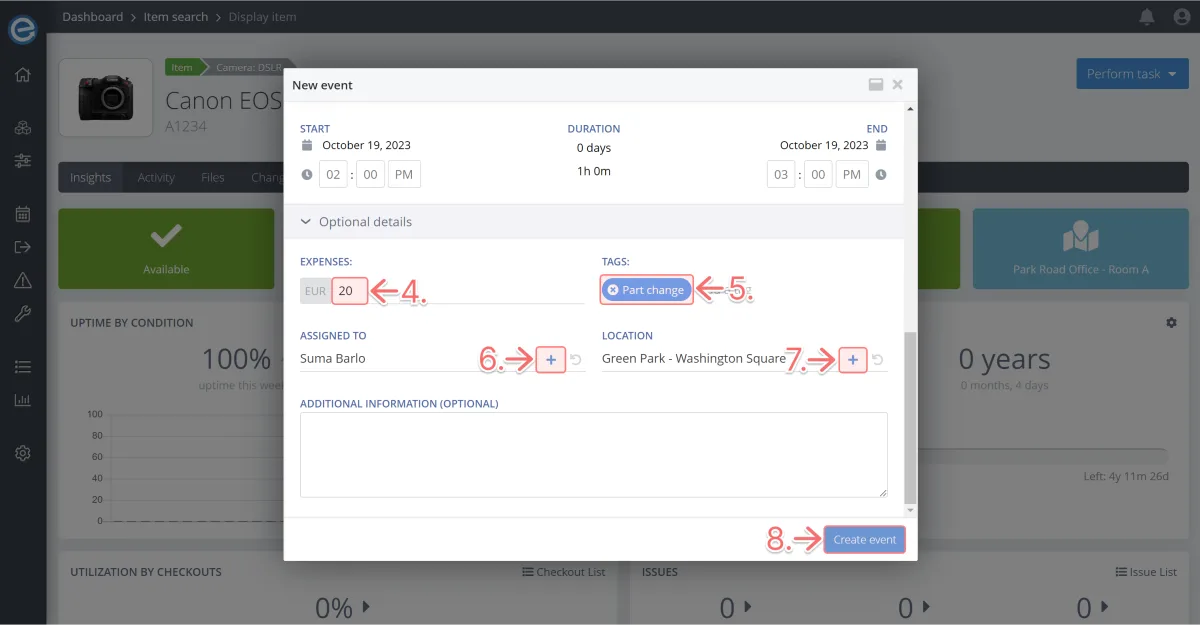
You should have the New event dialogue box open.
- Add the reason for the event. We’re going to enter New battery.
Click the Select items button and start typing the item name to add it.
Note: The item is automatically added when you create an Event from the Item page.
Add multiple items: You can select multiple items to add to the same Event. For instance, if the same part is changed for multiples of the same item.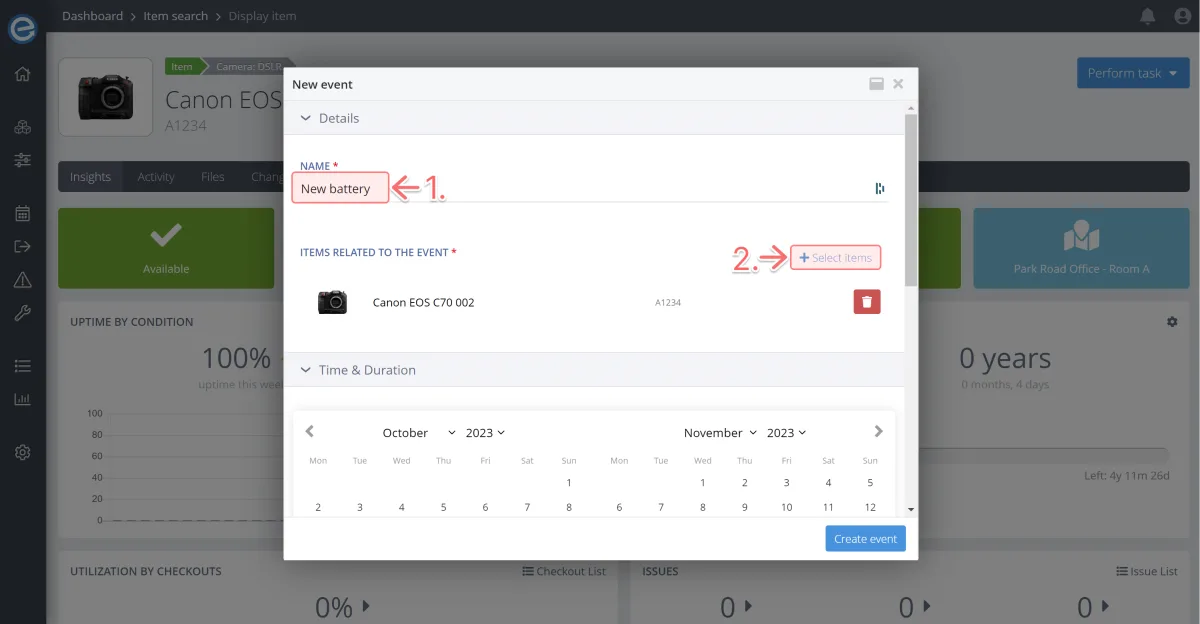
Event duration: Choose a time and date for the event. It may have happened in the past or could conclude in the future.
Let’s click yesterday’s date twice and change the end time so the duration is 1 hour.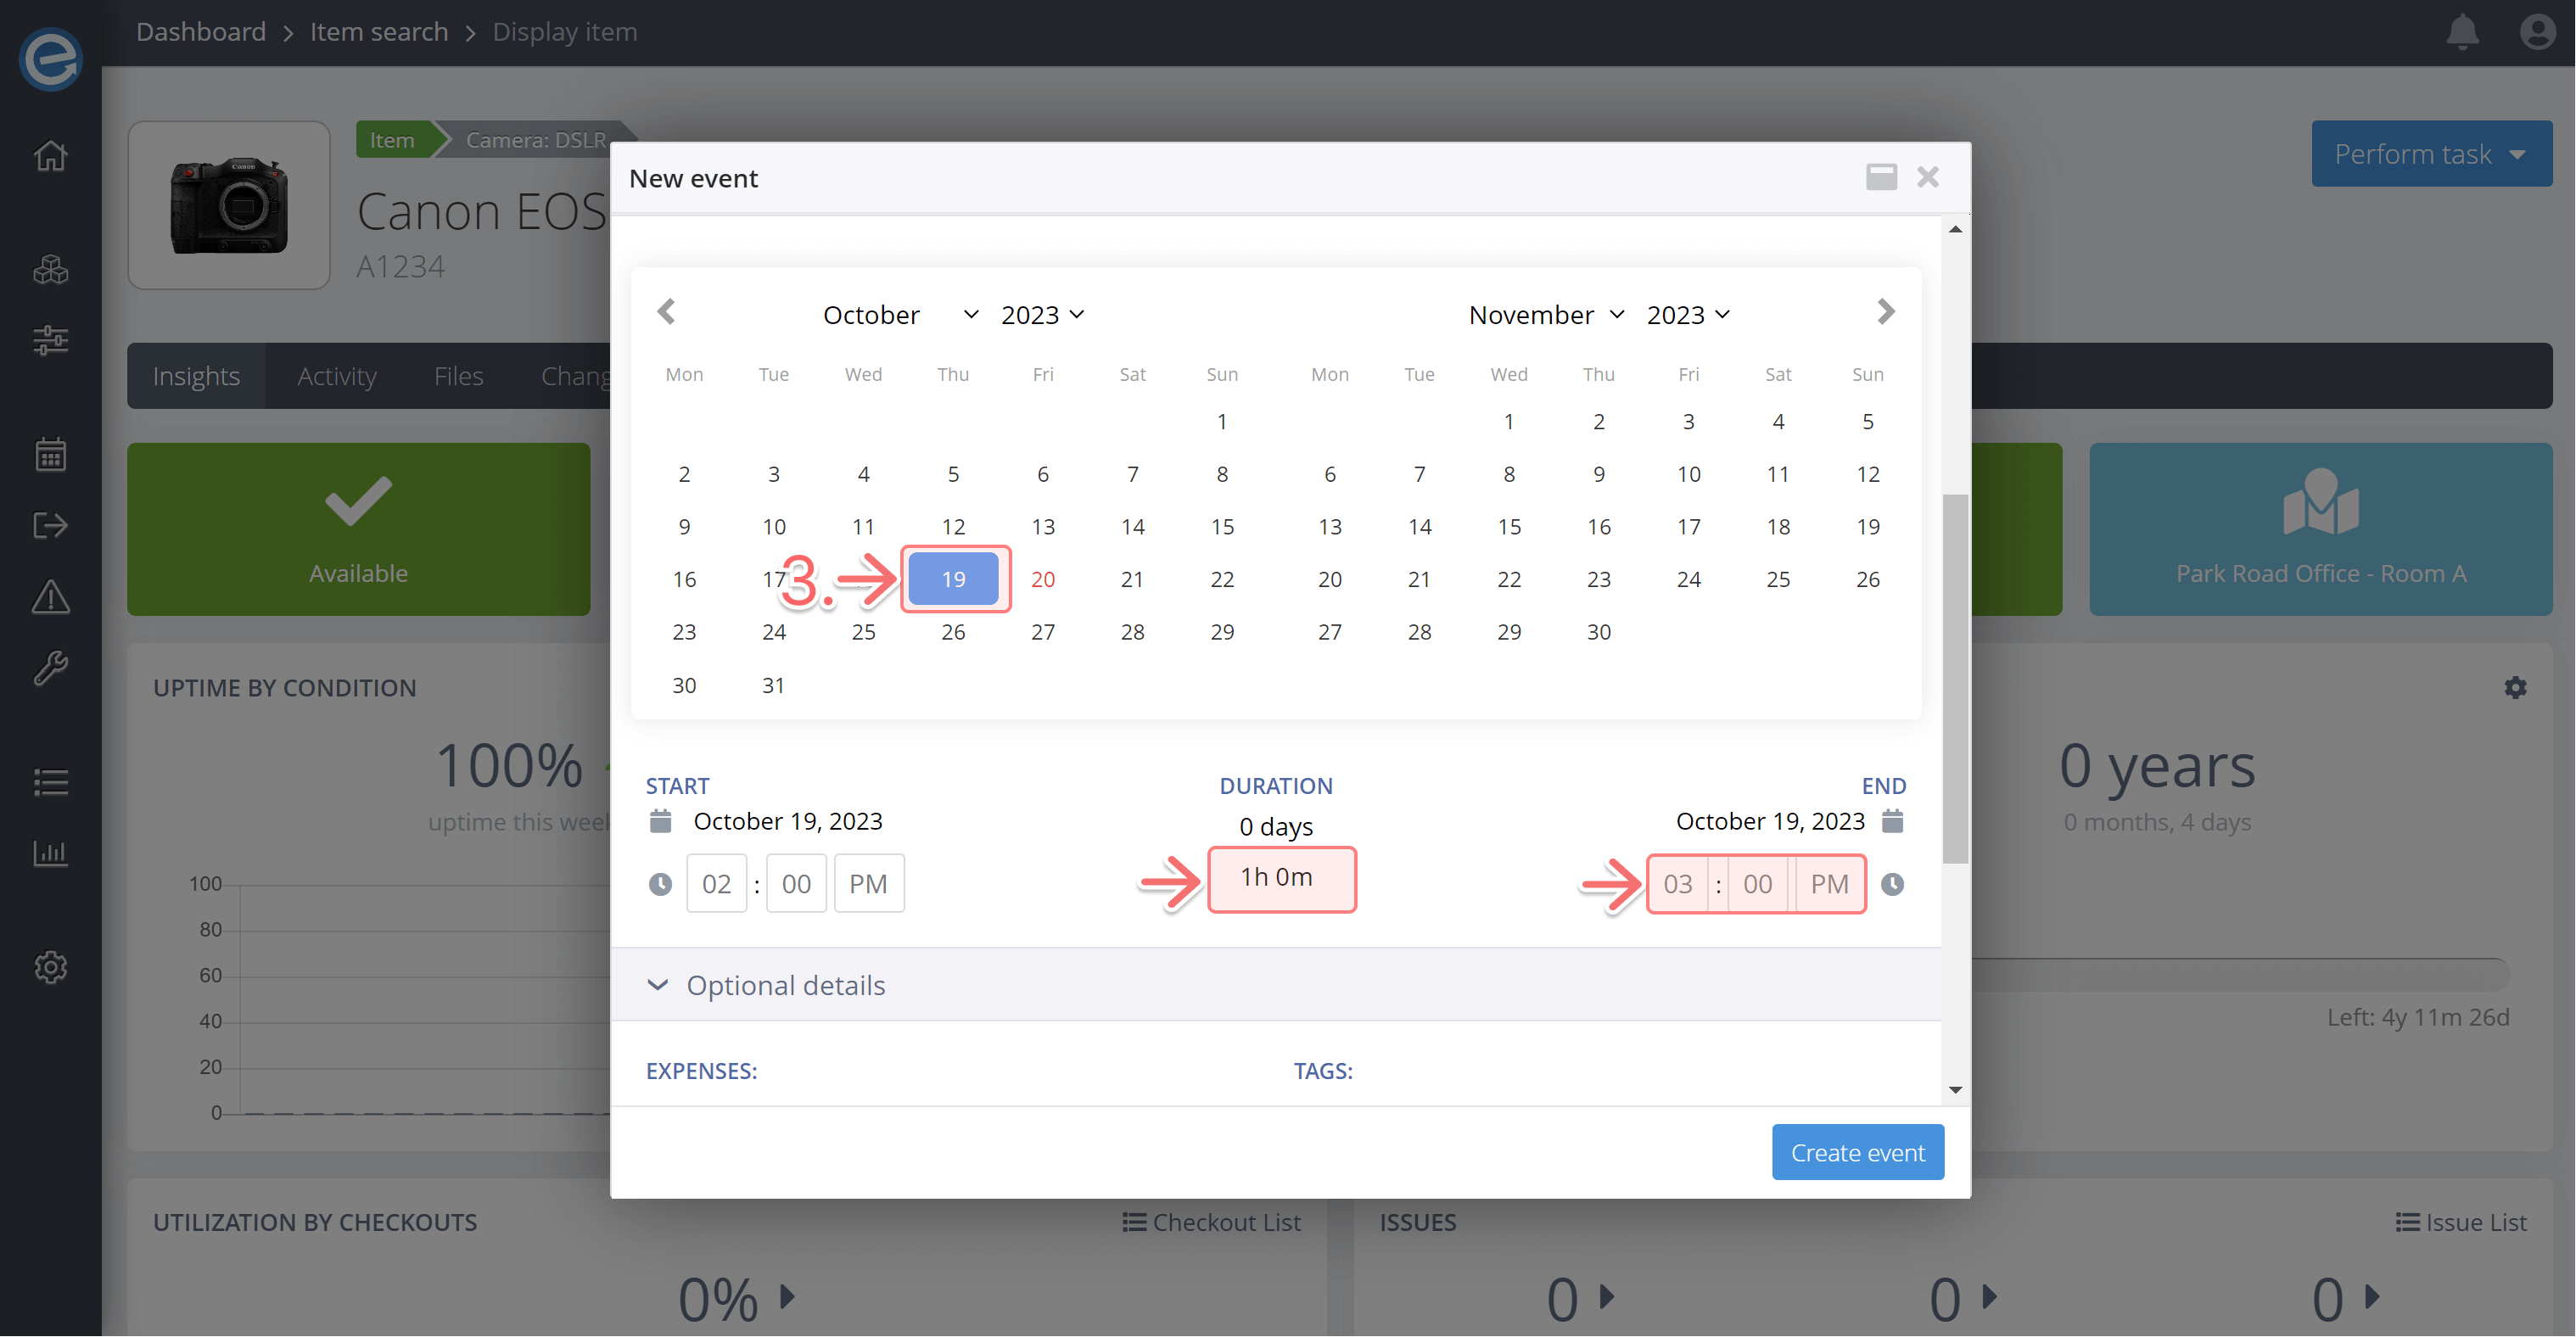
Expenses: Add any expenses related to the event. The amount usually includes VAT.
Pro tip: Change your currency by selecting Account under the Settings dropdown on the sidebar. Under the Account tab, you can select any currency to display your assets' value and related expenses.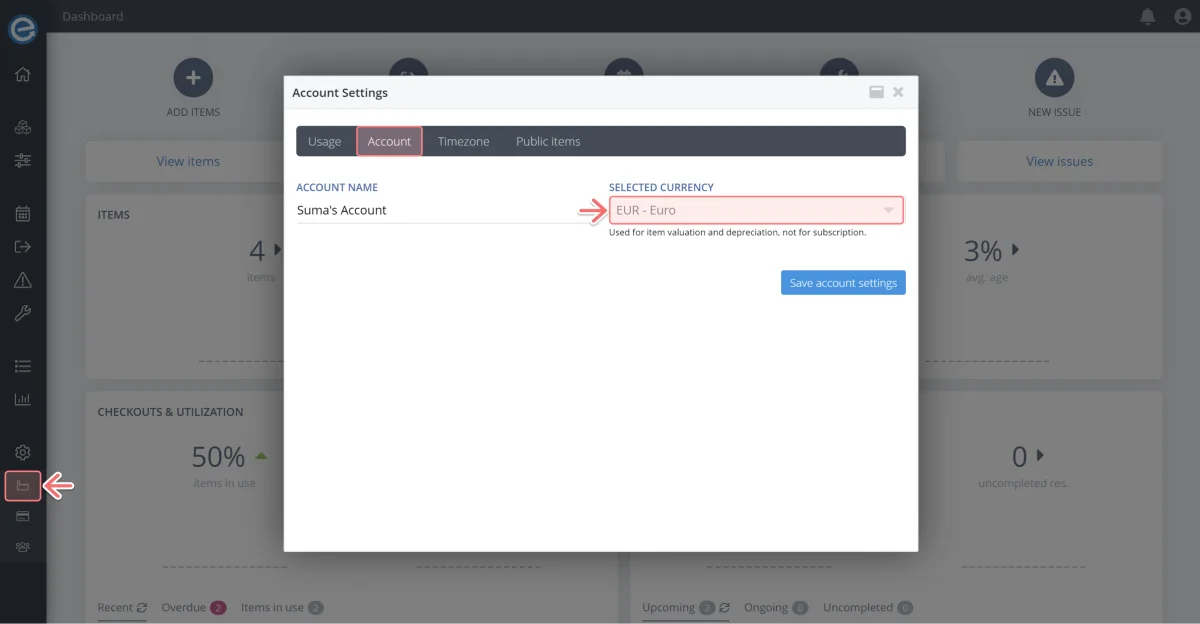
- Add a tag: This is a freeform text field to add a word or multiple words to help quickly identify the event type.
You may wish to create a set list of Event tags, such as Maintenance, Part change, and Warranty.
For this exercise, let's add Part change. Press Enter on your keyboard to add the tag. - Assigned to: Add the user who has been assigned the event. Click the + icon to add yourself.
- Location: This is where the event happened. This may be different from the usual storage location.
- Add any additional information related to the event then select Create event and you’re done