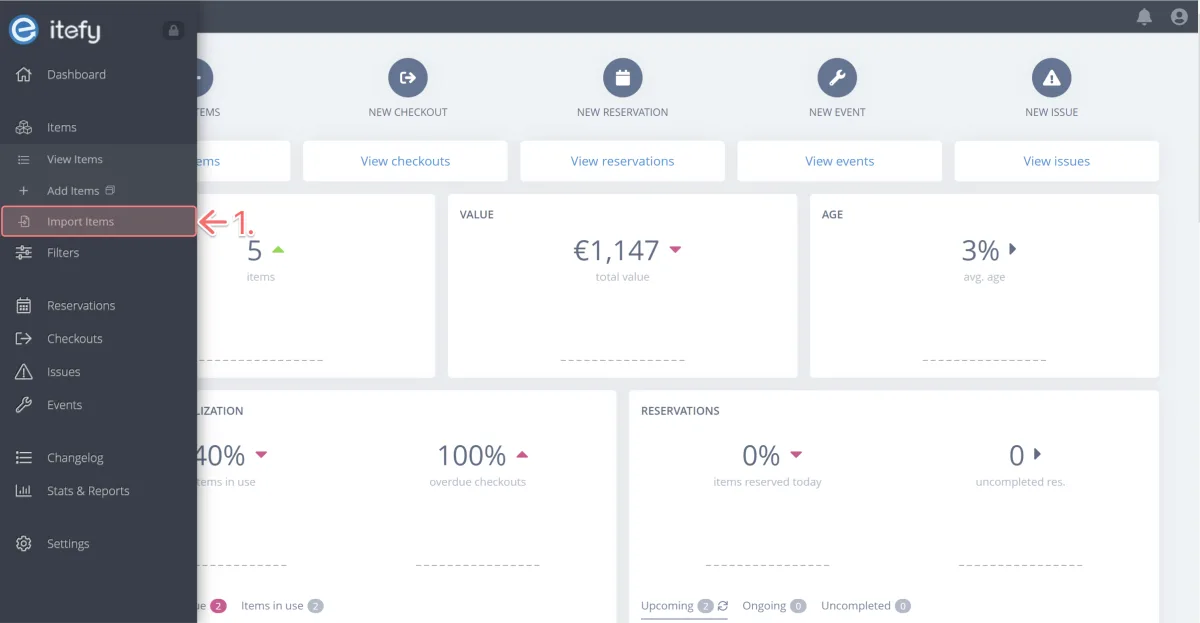
When your spreadsheet is ready, it’s time to import it into Itefy and populate your database.
Click Import items under the Items dropdown on the sidebar.
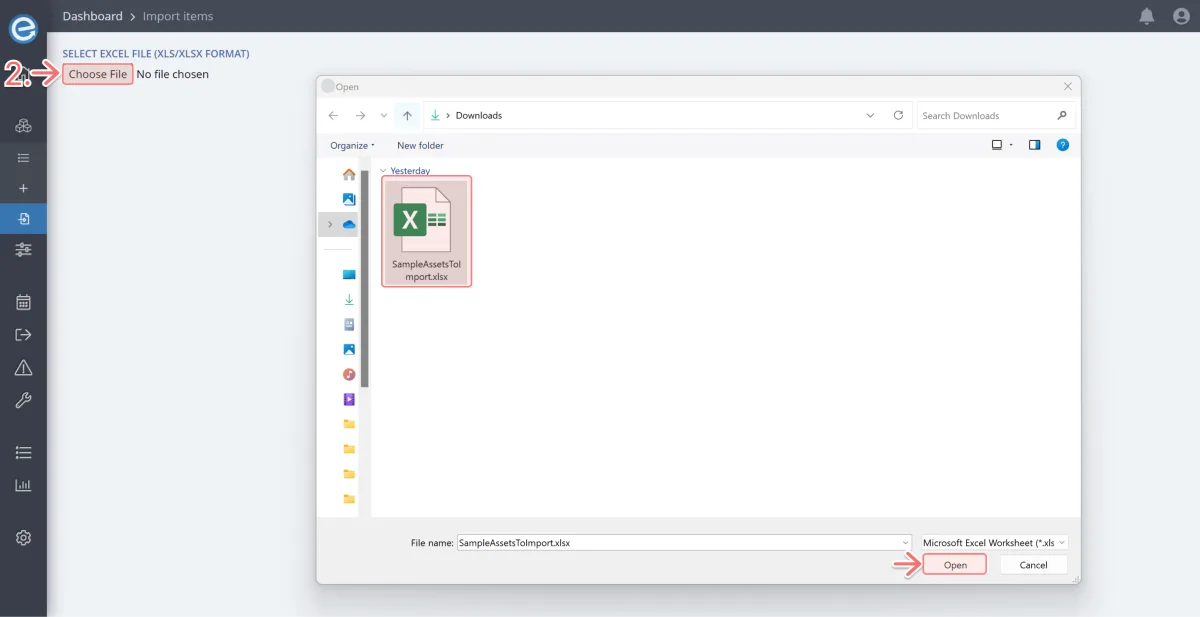
Click Choose file and select the .xlsx or .xls file to import, then click Open.
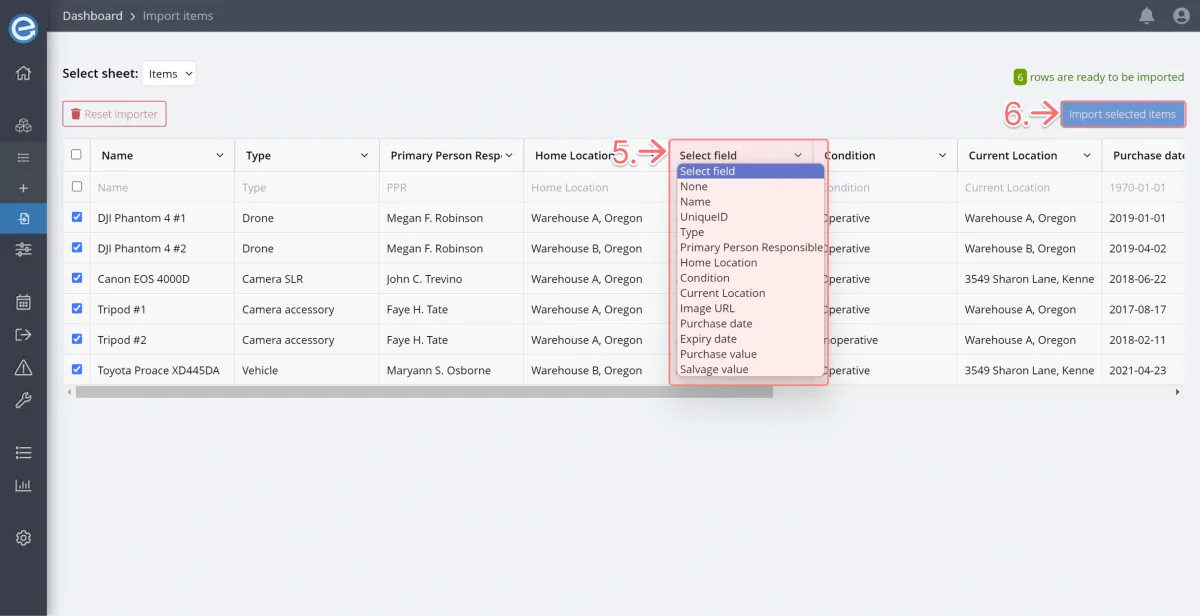
Here’s what the data looks like in Itefy once imported.
- If you cancel the import and make changes to the file, click Reset importer to remove the data and start again.
Uncheck any items you don’t want to import.
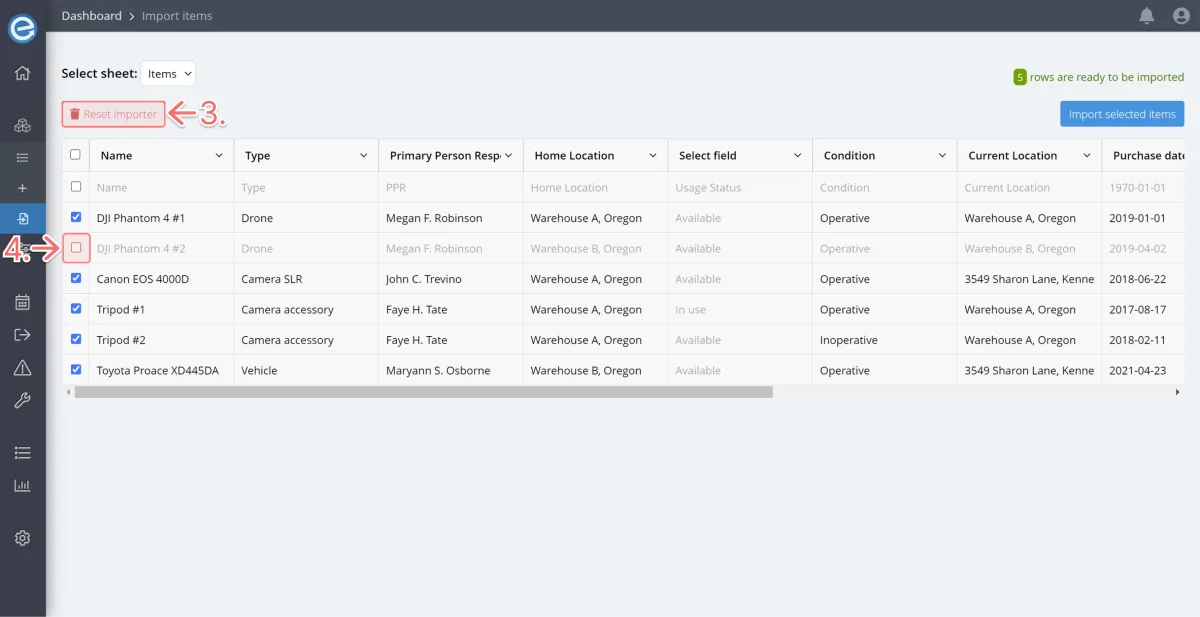
- If required, you can change the field that each column corresponds to.
For instance, the sample spreadsheet doesn’t have a Unique ID column. You can add one to the spreadsheet, import it, and then select the corresponding field ‘UniqueID’ from the dropdown for that column to ensure the data is mapped correctly.
Note: By default, the first row containing the column headings is unchecked and won’t be imported.
Once you are happy with the data, click Import selected items.
You’ll be prompted to confirm the import. Click OK.
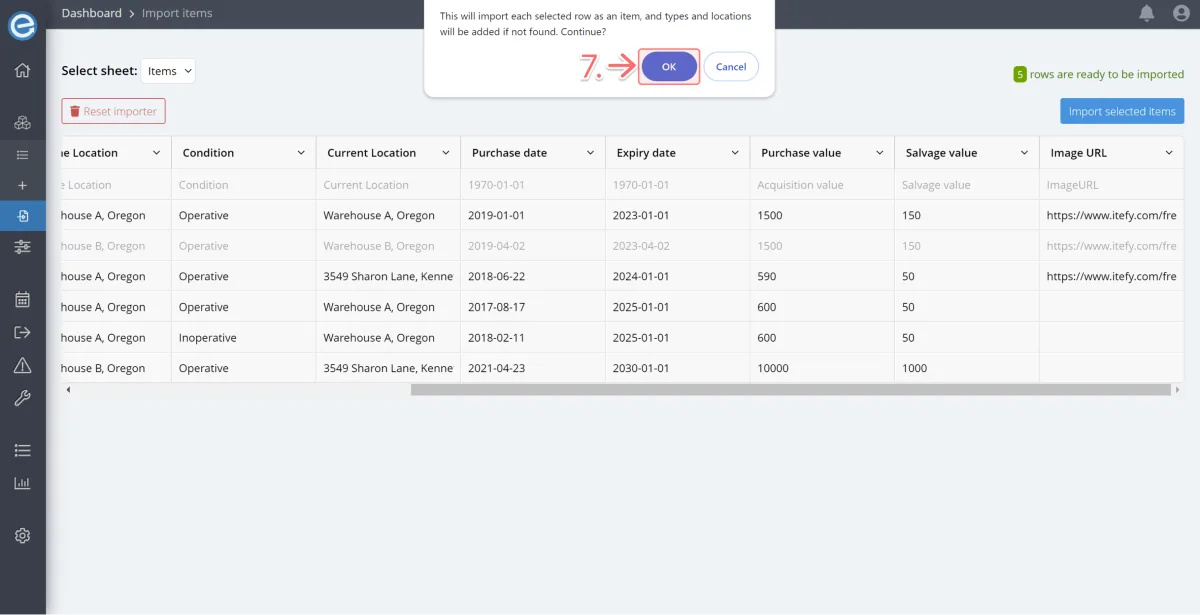
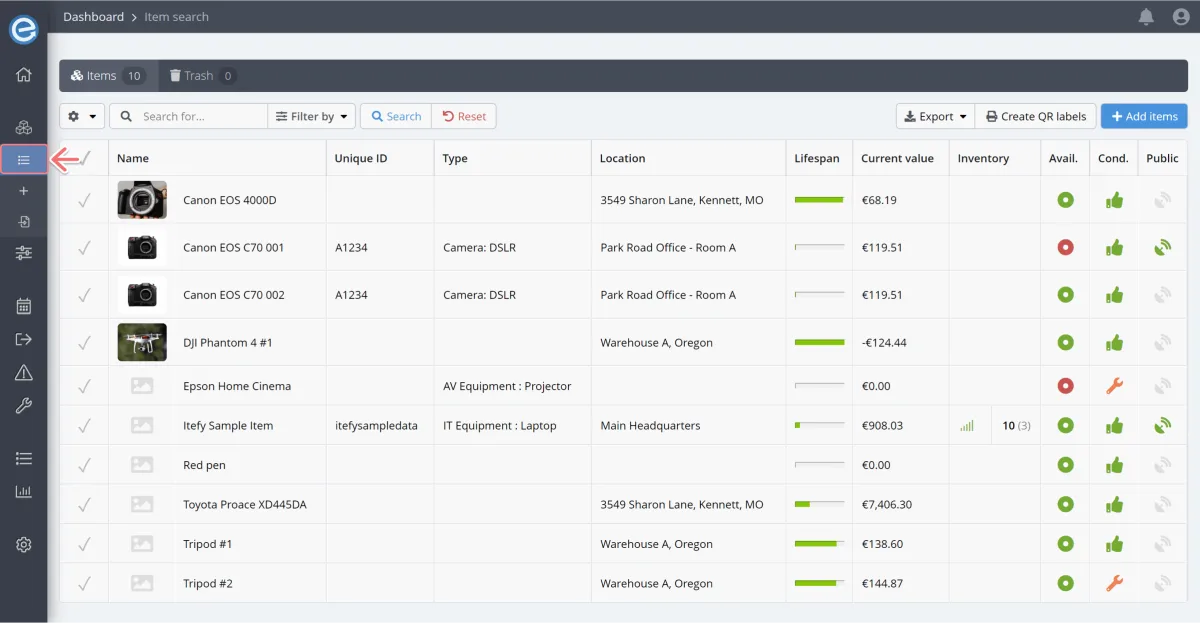
Your new items are now imported and are viewable on the View items page. Now you can click on each item to view, add and amend information.
