In Itefy, you can decide what information is displayed publicly and how. Let’s review your options:
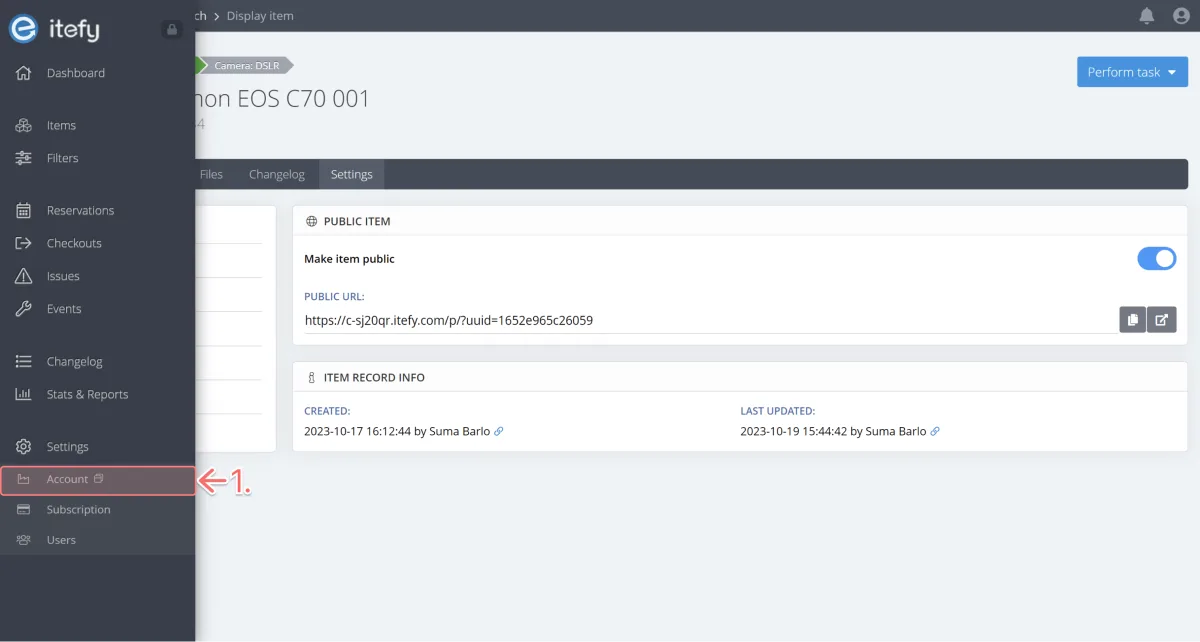
Select Account under the Settings dropdown on the sidebar.
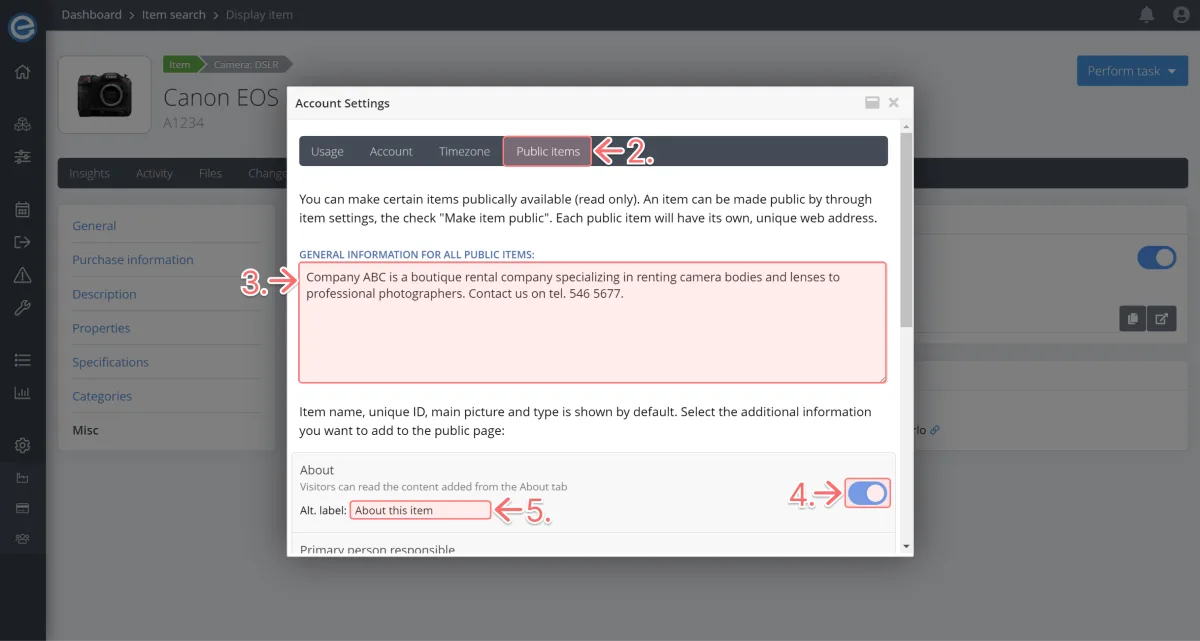
- Click the Public items tab.
- The first text field ‘General information for all public items’ is where you can add general information about your rental business. The information entered here will show at the bottom of every public item’s page.
Let’s insert this copy:
Company ABC is a boutique rental company specializing in renting camera bodies and lenses to professional photographers. Contact us on tel. 546 5677.
- About: Toggle this on so the item’s description is viewable in the public URL.
- Let’s change the About label to About this item.
Pro tip: You can change all the headings to something else in the Alt. label. For instance, if your customers are non-English speaking, you can change the labels to another language.
Let’s look at other information you can toggle on to display on your public pages:
- Primary person responsible: This displays the name of the person responsible for the item.
- Home location: Where the item is usually stored when checked in. For public items, this could be the pick-up and return address.
Let’s toggle this on to see how it looks. Let’s also change the Alt. label to: Pick-up/drop-off address
- Current location: Where the item is currently, such as the location when checked out.
Attachments: If you’ve uploaded documents to the item page, you can choose to display them for download.
Let’s toggle this on to see how it looks.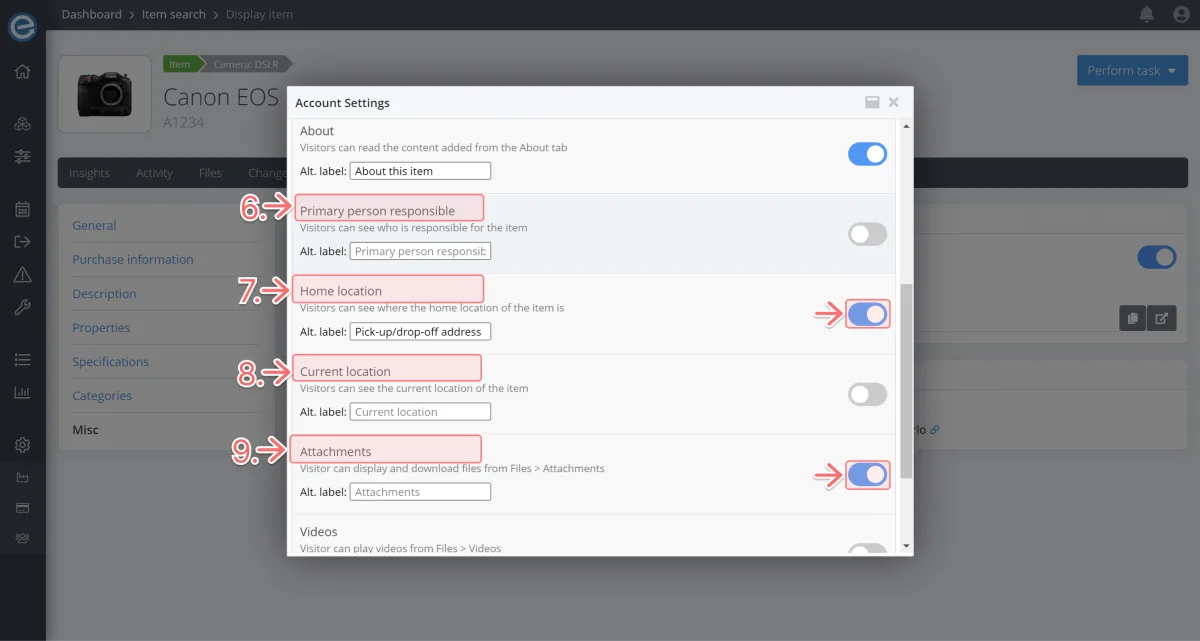
- Videos: If you’ve uploaded a video to the item page, you can choose to display it here.
We cover adding attachments and videos to an item’s page in Course 7 - Enriching your items - Part 2
- Open section on load: The About, Attachments and Videos are hidden by default in accordions.
You can choose one section to display with the accordion open when the URL loads.
Let’s select the About section to display on load.
- Click Save public items settings.
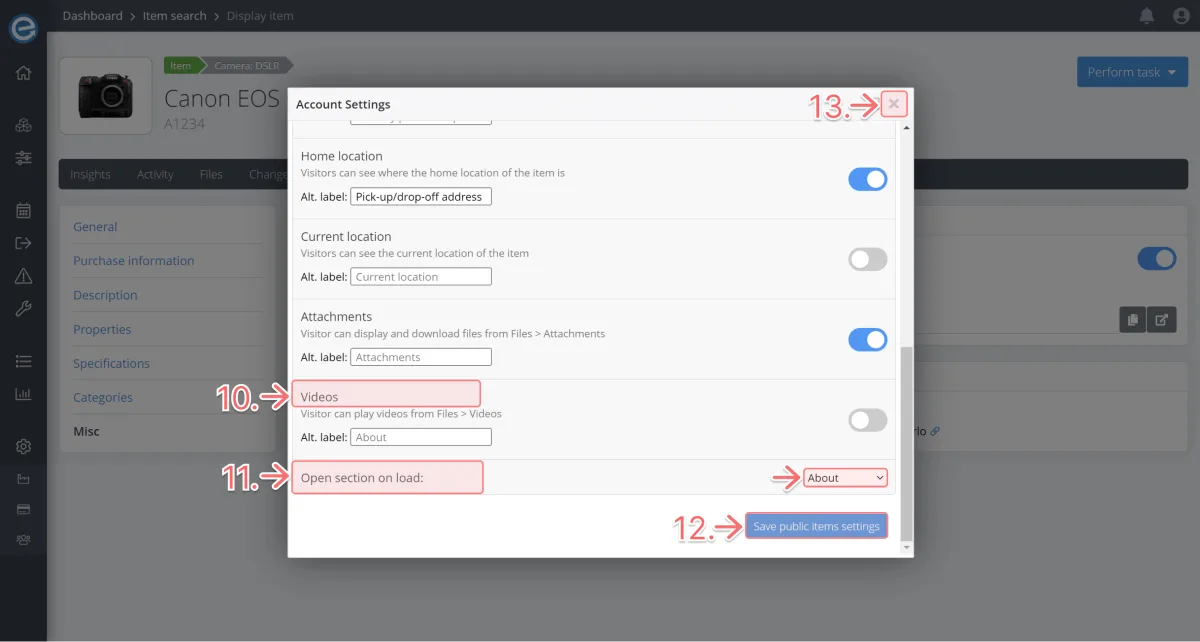
Click the X icon to close the window.
Let’s go back to the public URL tab:
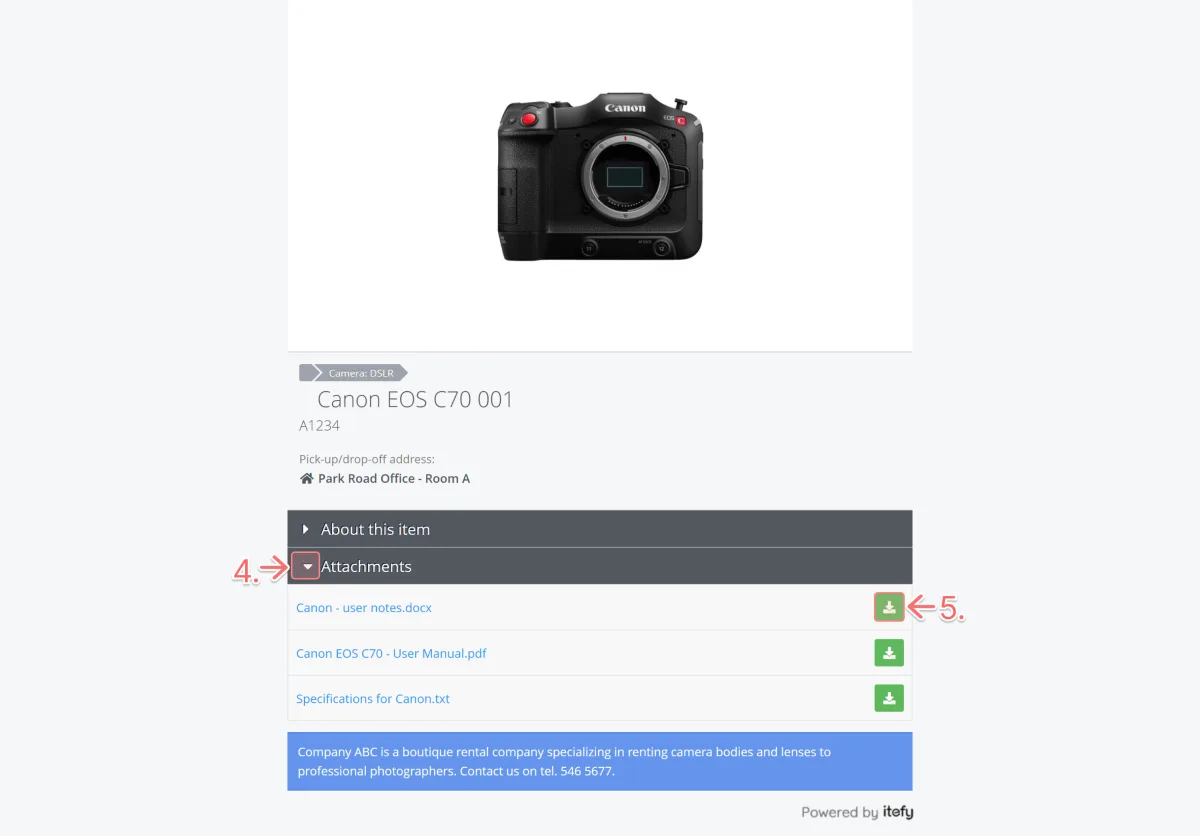
- Refresh the page to view the changes we’ve made.
- You can see the About this item section is now open by default.
The blue section shows the information you added earlier in the General information for all public items section on your Account.
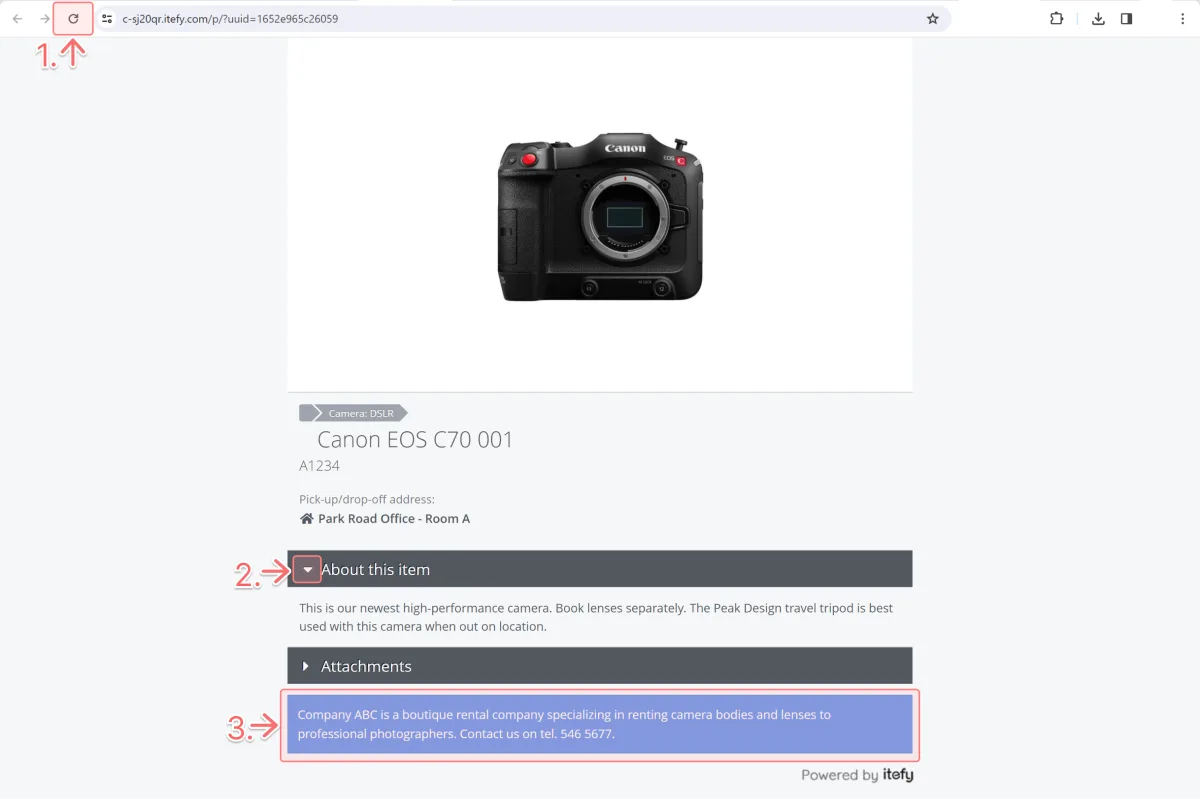
- Click the Attachments arrow icon to display the attachments in the accordion.
You can click the green icon to download the attachment.
